WAIT!
Don’t leave empty-handed! Grab this FREE survival & DIY guide!
Learn how to build a pro-level workshop, slash bills, and prep for any crisis even if you’re a beginner.
Get prepped, powered, and self-reliant starting today.


Simple Canoe Building: Step-by-Step Guide for Beginners

There’s something special about building a canoe with your own hands. It’s not just about ending up with a functional boat—it’s about the process of shaping wood or materials into something that moves through water with ease. Whether you're drawn to the craftsmanship or the practicality, constructing a canoe connects you to its design in a way store-bought models never can.
Learning how a canoe comes together gives you control over its weight, durability, and performance. This step-by-step guide on how to build a canoe simplifies the process so you can focus on the satisfaction of building rather than the uncertainty.
Here's a great video showing the assembly process for building a canoe.
Choosing the Right Canoe Design
Building a canoe starts with picking the right design. The best option depends on your skill level, tools, and how you plan to use the canoe. Some designs require more patience, while others balance simplicity and performance.
Here are three common canoe-building methods, each with distinct advantages.
Strip-Built Canoes
Strip-built canoes involve thin wood strips glued together over a mold, creating a smooth, lightweight hull. This method offers flexibility in shaping and results in a visually striking canoe.
- Best for: Builders with moderate woodworking skills
- Time investment: Considerable, but rewarding
- Key tools: Table saw, planer, clamps
The final boat is strong and lightweight, perfect for those who prioritize aesthetics and performance.
Stitch-and-Glue Canoes
Stitch-and-glue canoes use plywood panels stitched together with wire or zip ties, then bonded with epoxy. This approach is faster than strip-building and forgiving for beginners.
- Best for: First-time builders
- Time investment: Moderate
- Key tools: Jigsaw, epoxy, drill
The design sacrifices some refinement for simplicity, making it a practical choice for those who want a functional canoe without extensive woodworking.
Dugout Canoes
Dugout canoes are carved from a single log, the oldest known method of boat construction. This style demands patience and an understanding of wood grain.
- Best for: Experienced woodworkers with access to large logs
- Time investment: Lengthy
- Key tools: Adze, carving tools, patience
While heavy, a well-made dugout is incredibly durable and steeped in tradition, ideal for those who appreciate craftsmanship over speed.
Each design serves a different purpose. Match your choice to your skills and how you plan to use the canoe.
Gathering Materials and Tools
Before shaping your canoe, prepare the right materials and tools. The quality of your materials impacts durability, weight, and finish—so don’t cut corners. Whether you’re building a strip-planked boat or a stitched plywood design, these essentials set the foundation for success.
Wood Selection
The wood you choose affects strength, flexibility, and final weight. For strip-built canoes, cedar is popular for its lightweight and rot-resistant properties. It bends easily and glues well, making it ideal for curved hulls. Other options include:
- Northern white cedar: Light and easy to work with, great for beginners.
- Western red cedar: Slightly heavier but more rot-resistant, suitable for rugged use.
- Paulownia: A sustainable alternative with similar weight to cedar but less strength.
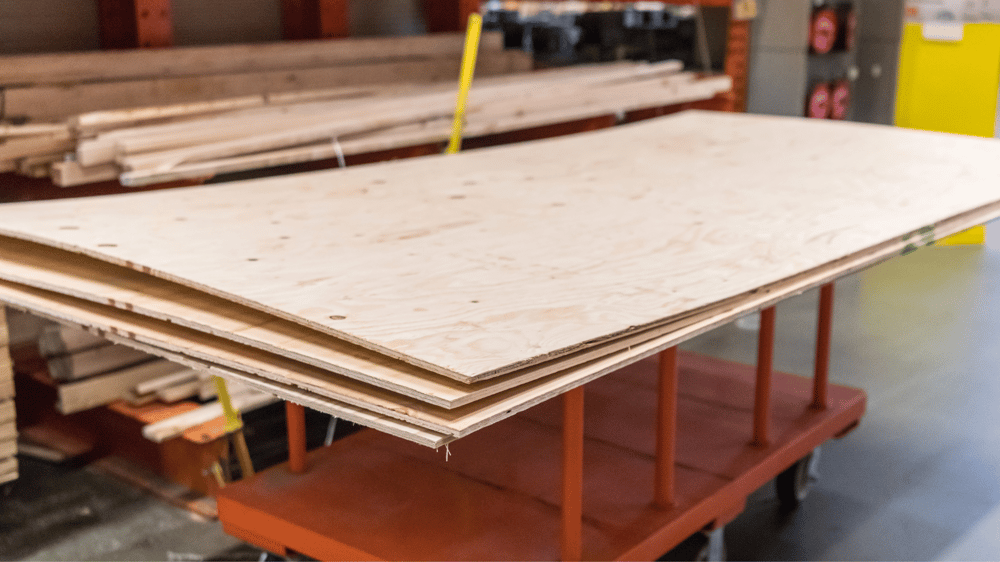
For stitch-and-glue designs, marine-grade plywood (like okoume or meranti) is essential. Avoid standard plywood—its layers can delaminate when exposed to water. Look for BS1088 certification, which guarantees waterproof glue and minimal voids.
Some builders recycle materials, while others prefer fresh lumber for consistency. Stay away from brittle woods that split easily—canoe ribs and planking need flexibility.
Epoxy and Fiberglass
Waterproofing is non-negotiable. Epoxy resin bonds wood strips or plywood seams, while fiberglass cloth reinforces the hull. For a balanced build:
- Marine epoxy: Choose a slow-curing formula for easier application.
- Fiberglass cloth: 6 oz weight provides solid protection without excessive bulk.
- Wood flour/silica thickener: Adjusts epoxy viscosity for filling gaps or creating fillets.
Always work in a ventilated area. Epoxy fumes are strong, and skin contact can cause irritation—gloves and masks are a must.


Essential Tools
A well-equipped workspace saves time and frustration. Here’s what you’ll need for most builds:
- Measuring & marking: Tape measure, carpenter’s square, marking knife.
- Cutting: Jigsaw (for plywood), table saw (for strip-cutting), block plane.
- Shaping: Spokeshave, rasp, sandpaper (80 to 220 grit).
- Assembly: Clamps (lots of them), screw gun, stainless-steel screws.
- Safety gear: Respirator, goggles, work gloves.
If you’re stitching plywood panels, copper wire or zip ties work for temporary holds. For strip-building, a strong adhesive like Titebond III ensures lasting bonds. Invest in quality tools—they make precision effortless.
Specialty tools like a staple puller help remove fasteners without damaging the wood, while a sharp chisel trims excess epoxy. A well-organized workspace prevents wasted time searching for misplaced tools.
Building the Canoe Frame
The frame shapes the canoe’s structure, dictating its strength, balance, and final form. Get this step wrong, and you’ll fight against uneven weight distribution or poor handling on the water. Precision here separates a functional boat from a cumbersome one.
Creating the Forms
Forms act as temporary molds, holding the canoe’s shape until the frame solidifies. For strip-built canoes, forms are cut from plywood and spaced evenly along a strongback (a rigid base).
- Template Transfer: Trace your canoe’s cross-section onto plywood using full-sized plans. A projector or grid method ensures accuracy.
- Cutting the Forms: Use a jigsaw to cut the outline, then sand edges smooth. Any imperfections here will transfer to the hull.
- Mounting on a Strongback: Secure forms perpendicular to the strongback, checking alignment with a level. Even 1/8" misalignment can warp the hull.
For stitch-and-glue designs, forms are less critical since plywood panels hold their shape when stitched. Still, a simple jig helps keep panels aligned during assembly.
Bending the Wood
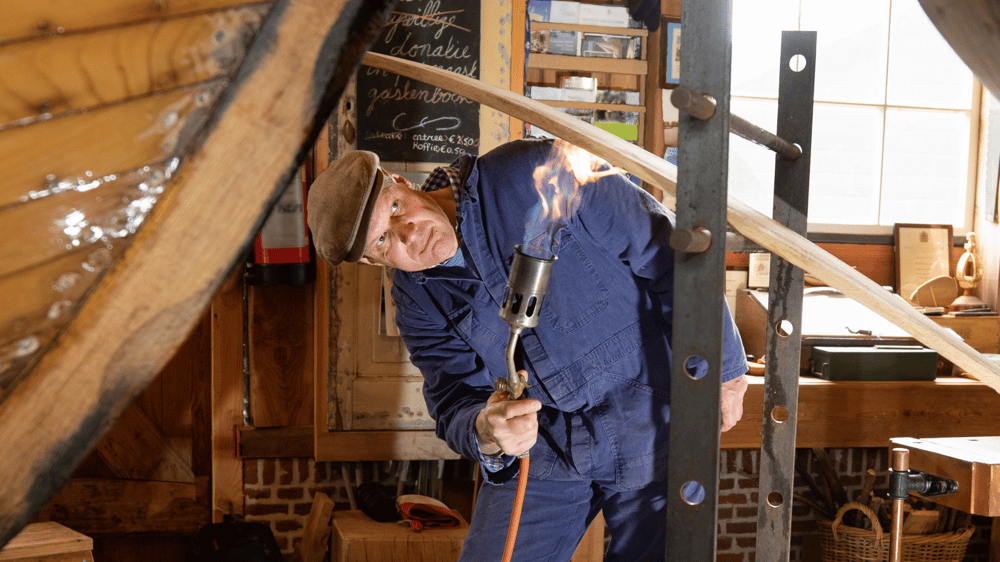
Bending wood without breaking it demands patience. Steam or soak thin strips to make them pliable, especially for tighter curves like the bow and stern.
- Steam Bending: A steam box softens wood fibers, allowing sharp bends. Cedar accepts steam well; keep it in the box for 60-90 minutes before clamping in place.
- Cold Bending: Soak strips in water overnight for gradual curves. This works for gentle bends but may split wood if forced too sharply.
- Backing Straps: Use metal or hardwood straps to distribute pressure and prevent kinks while bending.
Test bends on scrap wood first. If it snaps dry, it needs more moisture or heat.
Ensuring Symmetry
A lopsided canoe pulls to one side, wasting energy with every paddle stroke. Check symmetry at every stage.
- Measuring from Centerlines: Mark centerlines on forms and measure outward to corresponding points on both sides.
- Temporary Bracing: Use cross-spalls (temporary wooden braces) to hold frames in alignment until the hull stiffens.
- String Method: Run a string from bow to stern. Equal gaps between the string and both gunwales confirm balance.
Adjust as you go. Once epoxy sets, fixing asymmetry becomes far harder.
The frame is the skeleton of your canoe. Take time here, and the next steps—adding strips or panels—will flow naturally. For a deeper dive, explore this skin-on-frame canoe method for alternative framing techniques.
Adding the Hull and Finishing Touches
Once the frame is secure, the hull takes shape. This phase transforms the skeleton into a functional boat. Focus on alignment, sealing, and protection to ensure longevity and performance.
Attaching the Hull
For strip-built canoes, the hull consists of thin wood strips glued edge-to-edge over the forms. Start at the keel line and work upward. Use a bead of waterproof glue (like Titebond III) along each strip’s edge before clamping or stapling it in place.
- Trim excess: A block plane or spokeshave quickly levels uneven strips before sanding.
- Stagger seams: Offset strip joints to distribute stress and maintain hull strength.
- Disconnect power before work: Unplug batteries and solar panels when modifying wiring.
For stitch-and-glue designs, epoxy bonds the plywood seams after removing temporary wire stitches. Reinforce joints with fiberglass tape embedded in epoxy.

Sealing the Canoe
Waterproofing prevents rot and warping. Fiberglass cloth and epoxy create a tough, watertight shell.
- Apply epoxy: Coat the hull with a thin layer of epoxy using a foam roller. Work in small sections to avoid drips.
- Lay fiberglass: Drape fiberglass cloth over the wet epoxy, smoothing out wrinkles with a stiff brush
- Saturate the cloth: Add another layer of epoxy, ensuring the cloth becomes transparent. Remove air bubbles with a squeegee.
Let the epoxy cure fully—usually 24 hours—before sanding lightly with 220-grit paper. Repeat for the interior if needed.
Applying Varnish or Paint
A final coat protects against UV rays and abrasion. Choose marine-grade varnish for wood or enamel paint for plywood.
- Varnish: Apply 3-5 thin coats, sanding lightly between layers with 320-grit paper. Thin the first coat with 10% solvent for better penetration.
- Paint: Use a high-density foam roller for even coverage. Two coats typically suffice, but lightly sand between them.
Avoid thick layers, which can crack over time. Let the finish cure fully before exposing the canoe to water.
These steps ensure your canoe looks polished and withstands years of use. Next, we’ll cover installing seats and hardware.
Testing and Launching Your Canoe
After months of careful construction, your canoe is nearly ready for the water. But before that first paddle, testing ensures safety and performance. Skipping this step risks discovering leaks or instability when it’s too late to fix easily. Here’s how to check balance, identify leaks, and make your first launch smooth.
Testing for Balance
A well-balanced canoe tracks straight and handles predictably. To test balance without water, rest the canoe on leveled sawhorses or foam blocks.
- Center of Gravity Check: Sit in the canoe (or place weighted bags where seats will be) and observe how it rests. The hull should sit evenly without tilting
- Symmetry Test: Measure the distance from the gunwales to the ground on both sides. Differences over 1/2" indicate uneven weight distribution or hull asymmetry.
- Lateral Stability: Gently press down on one gunwale. The canoe should rock smoothly without sudden tipping—a sign of good secondary stability.
If the canoe leans, adjust seat placement or add slight ballast to the lighter side.

Checking for Leaks

Water tests reveal hidden gaps or weak seams. Fill the canoe with a few inches of water (or use a garden hose to wet the hull) and watch for drips.
- Interior Inspection: Look for water seeping through seams, especially near the bow, stern, and keel line.
- Exterior Marks: After draining, dark spots or dampness on the hull highlight problem areas.
- Epoxy Repairs: Mark leaks with chalk, dry the canoe thoroughly, and patch with thickened epoxy. Sand smooth once cured.
For stitch-and-glue canoes, pay extra attention to wire holes—these sometimes weep if not fully filled.
First Launch Tips
Your maiden voyage should be short and controlled. Choose calm, shallow water with easy access to shore.
- Buddy System: Bring a helper to stabilize the canoe as you enter and exit.
- Load Gradually: Step into the centerline, keeping weight low. Sudden shifts can capsize an untested hull.
- Initial Paddling: Take slow, even strokes to gauge tracking. If the canoe pulls left or right, revisit balance adjustments.
- Post-Launch Check: After 15 minutes ashore, inspect for new leaks or stress cracks..
A successful launch confirms your canoe is ready for adventure. Treat the first few outings as extended tests—note how the hull handles waves or wind, and make minor tweaks as needed.
Conclusion
Building a canoe is more than a project—it’s a journey that rewards patience and skill. Every strip of wood shaped, every seam sealed, and every final stroke of varnish adds to something tangible and lasting. When you push off the shore for the first time, the effort pays off in quiet moments on the water, knowing you built the craft under you.
Take pride in the work. Whether it’s a simple plywood design or a hand-finished cedar strip canoe, the result is yours alone. Share it, use it, and let it remind you what careful hands can create.
Now go paddle. The water’s waiting.





See other posts like this one:







Your home for DIY projects, off-grid solutions,
and real-world craftsmanship.
Contact
support@charliesworkshop.net
© 2025 Charlie's Workshop