WAIT!
Don’t leave empty-handed! Grab this FREE survival & DIY guide!
Learn how to build a pro-level workshop, slash bills, and prep for any crisis even if you’re a beginner.

Get prepped, powered, and self-reliant starting today.


Golf Cart Battery Reconditioning: Save Money and Extend Life
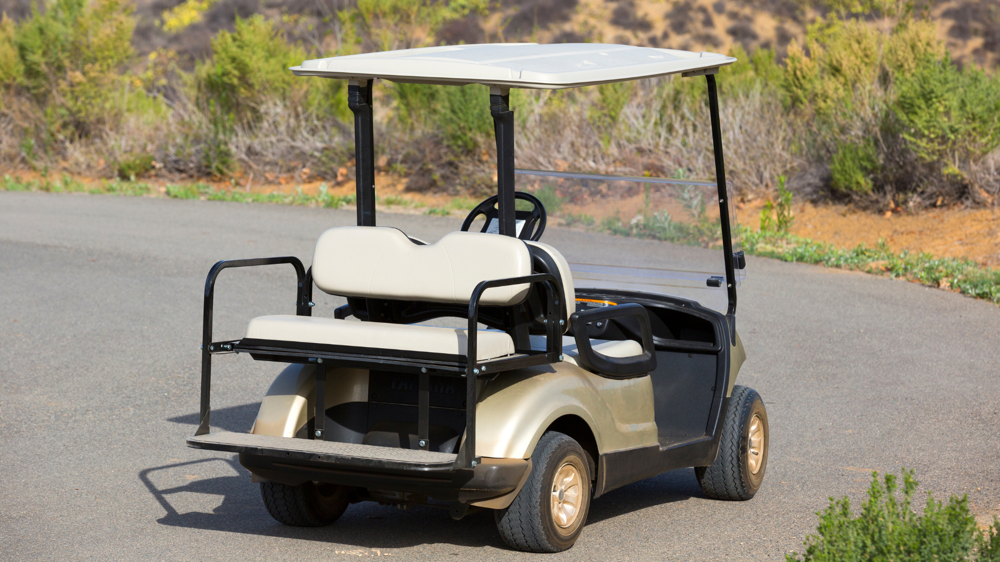
Golf cart batteries lose 20-30% of their capacity after just two years, but many can be revived instead of replaced. Reconditioning old batteries saves hundreds of dollars, reduces waste, and restores performance without buying new ones. With the right steps, you can often extend their lifespan by years.
This guide will show you how to test, clean, and recondition golf cart batteries properly. You’ll learn when batteries can be salvaged and when it’s time to replace them.
Watch this video on reviving dead golf cart batteries for a visual guide before diving in.
Understanding Golf Cart Batteries
Golf cart batteries store and supply the power needed to keep your cart moving. Like a car battery, they require maintenance and eventually degrade, but understanding how they work helps you recondition them effectively. The process starts with knowing what type of battery you have and why it loses performance.
Types of Golf Cart Batteries
Most golf carts use one of two battery types: lead-acid or lithium-ion. Each has advantages and drawbacks that affect performance and lifespan.
- Flooded Lead-Acid (FLA): The most common type, filled with liquid electrolyte. They’re affordable but require regular maintenance, like adding water and cleaning corrosion. Last 4-6 years with care.
- AGM (Absorbent Glass Mat): Sealed lead-acid batteries with no liquid to refill. More resistant to vibration and spills, but cost more than FLAs. Typically last 5-7 years.
- Gel Cell: Similar to AGM but uses a gel electrolyte. Extremely durable and low-maintenance, but sensitive to improper charging. Lifespan reaches 6-8 years.
- Lithium-Ion: Lightweight, fast-charging, and maintenance-free, but significantly more expensive. Can last 8-10 years under normal conditions.
Lead-acid batteries dominate the market because of their lower cost, but lithium-ion is gaining popularity for carts needing longer range and less upkeep.
How Batteries Degrade Over Time
Batteries don’t fail overnight—their performance drops gradually due to chemical wear. Here’s what happens inside them:
- Sulfation: Lead-acid batteries form sulfate crystals when left discharged. Over time, these crystals harden and block power transfer.
- Plate Corrosion: The metal plates inside corrode from constant charging cycles, reducing energy capacity.
- Water Evaporation: In flooded lead-acid batteries, water loss exposes plates to air, speeding up damage.
- Voltage Imbalance: Uneven cell charging strains some cells more than others, shortening overall life.
Lithium-ion batteries degrade differently, mainly from cycle aging (losing capacity after repeated charges) and heat exposure. However, they handle deep discharges better than lead-acid types.
Tools and Materials Needed for Reconditioning
Reconditioning golf cart batteries requires more than just effort—you’ll need the right tools. Proper equipment ensures safety, accurate testing, and effective cleaning. Gathering everything beforehand makes the process smoother and reduces mistakes.
Safety Equipment
Battery work involves acid, electrical hazards, and corrosive materials. Never skip these safety essentials:
- Rubber gloves: Protects hands from acid burns and electrical shocks.
- Safety goggles: Prevents acid splashes or debris from reaching your eyes.
- Apron or protective clothing: Keep corrosive substances off your skin and clothes.
- Ventilated workspace: Batteries release hydrogen gas—always work in open air or well-ventilated areas.
- Baking soda: Neutralizes acid spills on surfaces or skin.
Even experienced mechanics take precautions. A single mistake with battery acid or electrical connections can cause serious injury.
Cleaning Supplies
Dirt and corrosion speed up battery failure. These supplies remove buildup and restore connections:
- Wire brush or battery terminal cleaner: Scrubs away corrosion on terminals and cables.
- Distilled water and funnel: For refilling flooded lead-acid batteries—never use tap water.
- Battery cleaner spray: Dissolves grease and grime without damaging components.
- Cotton rags or microfiber towels: Wipes down battery surfaces after cleaning.
- Petroleum jelly or anti-corrosion gel: Coats terminals to prevent future oxidation.
Avoid using metal scrapers or harsh chemicals. They can scratch terminals or degrade battery casing. A mix of baking soda and distilled water works best, as discussed in this cleaning guide from Pete’s Golf Carts.


Testing Equipment
Guessing battery health wastes time. Reliable testing tools help you confirm whether reconditioning will work:
- Multimeter: Measures voltage levels to identify weak or dead cells.
- Hydrometer (for lead-acid batteries): Tests electrolyte specific gravity in each cell.
- Load tester: Simulates real-world power draw to assess capacity under stress.
- Battery charger (smart preferred): Recharges batteries slowly without overcharging.
Cheap testers give unreliable readings. Invest in quality tools—accuracy matters when deciding whether to repair or replace.
Step-by-Step Reconditioning Process
Reconditioning golf cart batteries isn’t complicated, but it requires methodical steps. Skipping or rushing any part can lead to poor results—or worse, damage. Follow this structured approach to maximize battery life and performance.
Inspecting the Batteries
Start with a thorough check before cleaning or charging. A quick visual inspection reveals obvious issues like cracks, leaks, or bulging cases—signs the battery may be beyond repair.
Use a multimeter to measure voltage. A fully charged 6V battery should read around 6.37V, and a 12V battery should show 12.7V. Readings significantly lower suggest deep discharge or sulfation. If readings are below 70% of these values, reconditioning may help. This GolfLink guide explains voltage checks in detail.
For flooded lead-acid batteries, check electrolyte levels. If plates are exposed, refill with distilled water before proceeding.
Look for:
- Corrosion (white/green powder on terminals)
- Low electrolyte levels (below plate tops in flooded batteries)
- Damaged cables or connectors (frays, cracks, or burns)
Cleaning the Battery Terminals
Dirty terminals create resistance, reducing efficiency. Cleaning ensures a strong connection for proper charging and power delivery.
Disconnect the battery starting with the negative terminal to prevent shorts. Scrub terminals and cable ends with a wire brush or terminal cleaner until shiny. For stubborn corrosion, mix baking soda and water (1 tablespoon per cup), apply with an old toothbrush, then rinse with distilled water. Dry completely before reconnecting.
After cleaning, coat terminals with petroleum jelly or anti-corrosion gel to slow future buildup.

Equalizing the Charge
Voltage imbalances weaken battery packs. Equalizing forces all cells to the same charge level, dissolving sulfate crystals in lead-acid batteries.
Use a charger with an equalization mode (or a manual setting for older models). For flooded lead-acid batteries:
- Fully charge the batteries first.
- Switch to equalize mode (typically 15.5–16V for 12V batteries).
- Let it run for 2–3 hours, monitoring temperature. Stop if batteries get excessively hot.
Lithium-ion batteries don’t need equalization. Their built-in management systems balance cells automatically.
Refilling Distilled Water (for Lead-Acid Batteries)
Flooded batteries lose water during charging. Low levels expose plates, accelerating wear. Refill only after charging—adding water beforehand can cause overflow as electrolyte expands.
- Remove vent caps carefully. Check each cell.
- Fill to just above the plates (1/4 inch below the fill ring).
- Avoid overfilling—excess water dilutes the electrolyte.
Use only distilled water. Impurities in tap water harm battery chemistry. Check levels monthly. For maintenance tips, see this guide from Go With Garretts.
Testing the Batteries After Reconditioning
Don’t assume success—verify performance. A hydrometer checks specific gravity in lead-acid batteries (1.265–1.299 indicates a healthy cell). For all battery types:
- Load test: Simulates real use with a load tester. Voltage shouldn’t drop below 10.5V (for 12V) under load.
- Runtime test: After full recharge, use the cart normally. Weak batteries deplete faster than others in a pack.
Replace any battery that fails these tests. Mixed old and new batteries strain the entire system.
Maintaining Reconditioned Batteries
Reconditioning golf cart batteries boosts performance, but their longevity depends on how well you maintain them afterward. Neglecting simple routines leads to faster degradation, forcing you to repeat the reconditioning process sooner. To maximize their lifespan, adopt these best practices.
Routine Checks
Regular inspections catch minor issues before they become major problems. Whether your batteries are flooded lead-acid or sealed, set a schedule—monthly checks work for most users.
Prioritize these tasks during checks:
- Terminal inspection: Look for corrosion or loose connections. Tighten terminals if they wiggle.
- Electrolyte levels (flooded batteries): Ensure liquid covers the plates. Refill with distilled water if needed.
- Case integrity: Check for cracks, leaks, or bulging—signs of internal damage.
- Voltage test: Use a multimeter to verify each battery holds charge consistently.
For flooded batteries, water levels drop faster during charging. Always top them off afterward, not before.
Proper Charging Practices

Charging mistakes shorten battery life. Overcharging fries cells, while undercharging causes sulfation. Follow these rules to charge smarter:
- Avoid partial charges. Lead-acid batteries last longer when charged fully after each use.
- Use a smart charger. It automatically stops when batteries reach full capacity, preventing overcharge.
- Charge in a cool place. Heat accelerates chemical wear—keep batteries out of direct sunlight.
- Don’t leave batteries discharged. Store them with at least 50% charge to prevent sulfate buildup.
For flooded batteries, water levels drop faster during charging. Always top them off afterward, not before.
Storage Tips
Golf carts often sit unused for weeks or months. Poor storage destroys reconditioned batteries quickly. Protect them during downtime:
- Clean terminals first. Remove corrosion and apply anti-oxidation gel.
- Store at 50-70% charge. Full charge strains cells, but empty ones risk sulfation.
- Keep in a dry, temperate space. Freezing temperatures crack cases; heat speeds self-discharge.
- Disconnect batteries if unused for months. This prevents parasitic drain from cart electronics.
For long-term storage, recharge every 2-3 months to maintain optimal voltage. Lithium-ion batteries fare better but still lose charge gradually—check them quarterly.
Consistency matters more than intensity. Quick monthly checks and mindful charging habits add years to your battery pack’s life.

When to Replace Instead of Recondition
Reconditioning golf cart batteries can work wonders, but not every battery can be saved. Sometimes, pushing for one more season isn’t worth the effort or cost. Recognizing when to walk away prevents wasted time and ensures your cart stays reliable.
Signs of Irreparable Damage
Some damage can’t be fixed, no matter how thorough the reconditioning. Watch for these red flags:
- Physical damage: Cracks, leaks, or bulging casings mean internal failure. A leaking battery also risks acid spills and electrical shorts.
- Dead cells: If a voltage check shows one or more cells reading zero, that battery won’t hold a charge.
- Excessive sulfation: Heavy, chalky buildup on plates blocks energy flow. If equalizing doesn’t dissolve it, the battery is too far gone.
- Persistent low voltage: Even after a full charge, a battery that drops below 10.5V (for 12V) under load is failing.
Aged batteries nearing their typical lifespan (4-6 years for lead-acid) often decline rapidly. Reconditioning buys time but won’t reverse years of wear.

Cost-Benefit Analysis
Reconditioning isn’t free. Compare the expenses before committing:
- Time and effort: Cleaning, equalizing, and testing take hours. If multiple batteries need work, weigh that against the cost of replacements.
- Materials: Distilled water, cleaning supplies, and anti-corrosion gel cost little, but tools like load testers or smart chargers add up.
- Replacement parts: Corroded cables or damaged connectors may need replacing too.
Here’s when replacement makes more sense:
- A single weak battery drags down an otherwise healthy pack.
- Reconditioning attempts fail after multiple tries.
- Newer battery tech (like lithium-ion) offers long-term savings over maintaining old lead-acid models.
If a battery costs more to fix than replace, or if reliability matters most—like for commercial carts—opt for new.
Conclusion
Reconditioning golf cart batteries cuts costs and keeps your cart running longer. Proper testing, cleaning, and equalization can revive weak batteries—but only if caught early. Lead-acid types benefit most from this process, while lithium-ion batteries rarely need it.
Regular maintenance matters. Check terminals monthly, charge fully after each use, and store batteries properly. Ignoring these steps wastes time and money on repeat repairs.
If your batteries show physical damage or won’t hold a charge, replacement is the better choice. For those still viable, a methodical reconditioning approach extends their life by years.
Got a battery pack that’s underperforming? Try these steps before buying new. Share your results or ask questions in the comments—other readers may benefit from your experience.







Your home for DIY projects, off-grid solutions,
and real-world craftsmanship.
Contact
support@charliesworkshop.net
© 2025 Charlie's Workshop