WAIT!
Don’t leave empty-handed! Grab this FREE survival & DIY guide!
Learn how to build a pro-level workshop, slash bills, and prep for any crisis even if you’re a beginner.
Get prepped, powered, and self-reliant starting today.


Thoughtful DIY Wooden Gift Ideas Anyone Can Make

Nothing beats the warmth of a handmade gift—especially when it’s crafted from wood. Whether you’re a beginner or a seasoned woodworker, creating something by hand adds a personal touch store-bought presents just can’t match.
Woodworking offers endless possibilities, from simple keepsakes to functional pieces loved ones will use daily. In this post, you’ll find easy-to-make diy wooden gift ideas that suit any skill level and budget. Get ready to turn raw materials into heartfelt surprises.
Need inspiration? Watch how these easy DIY wood gift ideas come together. You'll find projects that work for any skill level.
Simple Wooden Gift Ideas for Beginners
Not everyone has advanced woodworking tools, but that shouldn’t stop you from making beautiful gifts. With just a few supplies, basic skills, and some creativity, you can craft thoughtful wooden presents that stand out. These projects require minimal effort but deliver maximum charm—perfect for first-time woodworkers.
Personalized Wooden Coasters
Wooden coasters are simple yet practical, and they let you add a personal flair without needing fancy tools. Start with pre-cut wood rounds or square tiles from a craft store—pre-sanded to save time. If you prefer, cut them yourself using a handsaw or jigsaw.
Here’s how to customize them:
- Pyrography (wood burning): A cheap wood-burning pen lets you etch names, dates, or simple patterns like leaves or geometric shapes.
- Paint or stain: Acrylic paint works for colorful designs, while wood stain enhances natural grain. Seal with mineral oil or polyurethane for durability.
- Carved initials: Use a small chisel or Dremel tool to carve monograms for an elegant touch.
Pro tip: Sand the edges smooth and round corners for a polished finish.
Wooden Key Holder with Hooks
A key holder keeps lost keys in one place while adding rustic charm to any entryway. You’ll need:
- A sanded wooden board (8–12 inches long works well).
- 3–4 metal or wooden hooks (screw-in or adhesive-backed).
- Wood stain or paint (optional).
Assembly is straightforward:
- Stain or paint the board first if desired—let it dry completely.
- Space the hooks evenly along the bottom edge, then screw or glue them into place.
- Add a small sawtooth hanger on the back for easy wall mounting.
For extra personality, stencil a name or phrase at the top, or use a wood burner to add intricate detailing.
Handcrafted Wooden Picture Frames
Nothing elevates a favorite photo like a handmade wooden frame. Choose between a rustic look with reclaimed wood or a sleek design with clean-cut pine.
Materials needed:
- 1x2 or 1x3 lumber (cut to match your photo size).
- Wood glue and small nails or a brad nailer.
- Sandpaper (150–220 grit) and a clear finish.
Steps:
- Cut four pieces at 45-degree angles using a miter box or saw.
- Glue the corners together, clamp until dry, then reinforce with nails.
- Sand smooth and finish with wax, stain, or varnish.
For variation, try distressing the wood with a hammer and chain before staining, or attach small adhesive jewels for a touch of sparkle.
For detailed measurements and techniques, this guide breaks it down clearly.
Intermediate Woodworking Gift Projects
Ready to level up your woodworking skills? These intermediate projects require a bit more time and precision but deliver stunning results. Perfect for birthdays, holidays, or just because—nothing says "I care" like a handcrafted wooden gift that blends beauty and function.
Wooden Serving Tray
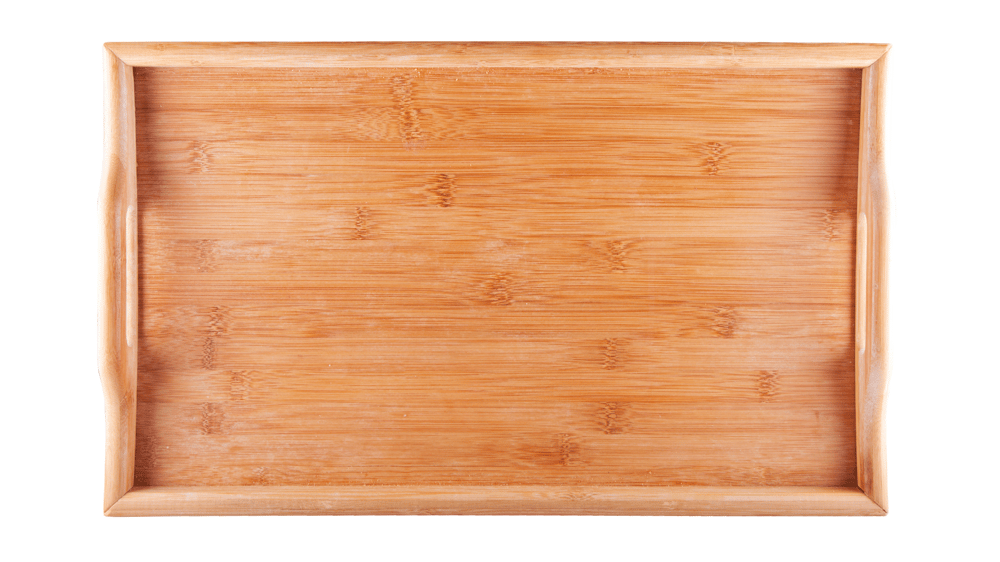
A wooden serving tray is both practical and stylish, ideal for breakfast in bed or entertaining guests. Start with hardwood like maple, walnut, or cherry for durability. Here’s how to build one:
- Cut the base: Size it to your preference (e.g., 16" x 12"). Use a table saw for clean edges.
- Add handles: Opt for routed handholds for a seamless look or attach brass or wooden handles with screws.
- Assemble the sides: Glue and nail 1" tall trim pieces around the edges to keep items from sliding off.
- Finish smooth: Sand up to 220 grit, then apply food-safe mineral oil or a water-based polyurethane for a satin sheen.
Pro tip: For a personalized touch, wood-burn initials or a decorative border along the edges.
Custom Wooden Cutting Board
A well-made cutting board becomes a kitchen staple. Hardwoods like maple, walnut, or teak resist knife marks and last for years. Follow these steps:
- Select the wood: Mix light and dark species for a striking contrast, or stick to a single type for uniformity.
- Glue and clamp: Arrange the boards edge-to-edge, apply waterproof wood glue, and clamp tightly overnight.
- Shape it: Round the corners with a jigsaw or router for comfort and style.
- Sand and finish: Start with 80-grit paper and work up to 220 grit. Coat with mineral oil, reapplying monthly to maintain its luster.
Sand thoroughly and apply multiple coats of oil to protect the wood. This cutting board tutorial covers everything from assembly to finishing touches.
Pro tip: Add rubber feet to prevent slipping and extend its lifespan.
Care tip: Hand-wash only and avoid soaking to prevent warping.


Small Wooden Jewelry Box
This project lets you experiment with joinery and detailed work. Use cedar or aromatic redwood to naturally repel moths.
Steps:
- Build the box: Cut six panels (front, back, sides, top, and bottom). Dovetail or box joints add strength.
- Install the lining: Adhere velvet or felt to the interior for a soft finish.
- Add hardware: Small brass hinges and a magnetic clasp keep it secure.
- Personalize: Stain, paint, or carve designs—try an inlaid wood accent on the lid for extra flair.
Advanced DIY Wooden Gift Projects
For woodworkers who enjoy a challenge, these advanced projects elevate craftsmanship with precision and creativity. Whether you're making a one-of-a-kind wooden clock or a sturdy small bench, these gifts blend function and artistry—ideal for showing off your skills and giving something truly special.
Wooden Clock with Custom Design
A wooden clock isn’t just a timepiece—it’s a statement. Start with a solid wood slab (walnut or oak works well) and a quartz clock movement kit, which keeps costs low and assembly simple. Here’s how to make it uniquely yours:
Design the face:
- Laser-cut patterns: Use a CNC machine or hand-carve geometric shapes for a modern look.
- Natural edges: Keep the wood’s live edge for rustic appeal, sanding it smooth.
- Inlay accents: Add contrasting wood or resin to highlight numbers or markers.
Assembly steps:
- Drill a center hole for the clock mechanism.
- Attach the movement’s shaft through the hole, then secure the hands.
- Stain or oil the wood to protect it, leaving the natural grain visible.
For extra flair, backlight the clock with LED strips or use a bold stain like ebony for high contrast.
Handmade Wooden Furniture: Small Bench
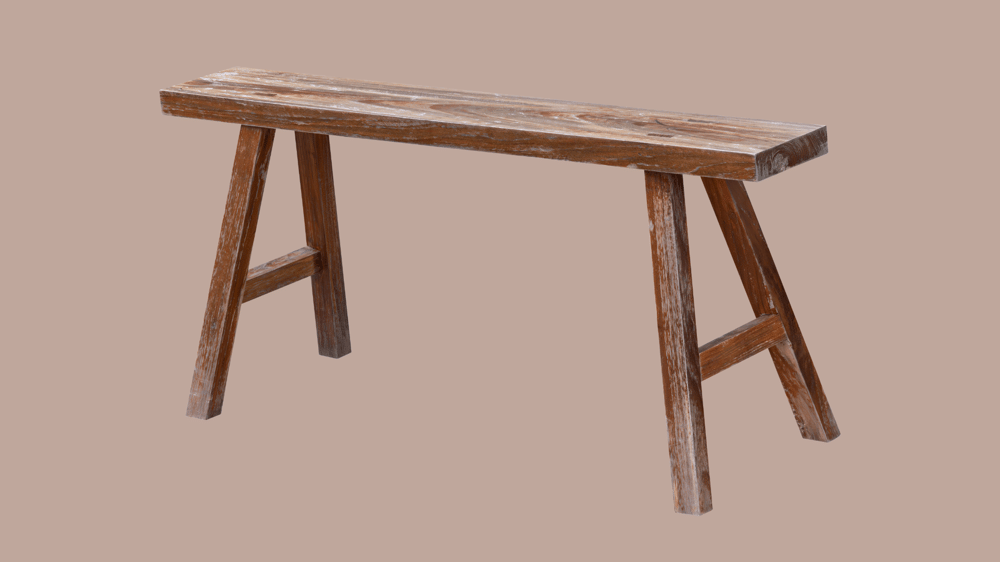
A small bench is deceptively simple—its strength lies in clean joinery and a flawless finish. This project suits entry-level furniture makers ready to practice mortise-and-tenon or dowel joints.
Materials needed:
- Hardwood planks (1.5" thick for legs, 0.75" thick for the seat).
- Wood glue and clamps.
- Sandpaper (80 to 220 grit).
Step-by-step build:
- Legs and stretchers: Cut four legs (16–18" tall) and two stretchers. Join them with mortise-and-tenon or dowels for stability.
- Seat: Use a single plank or glue narrower boards edge-to-edge. Round the corners with a router for comfort.
- Finish: Sand thoroughly, then apply danish oil for a matte, durable coat.
Pro tip: For added detail, chamfer the edges of the legs or carve a shallow groove along the seat’s perimeter.
These projects take time, but the result—a gift that lasts generations—is worth every minute.
Eco-Friendly Wooden Gift Ideas
Woodworking and sustainability go hand-in-hand—why buy new when reclaimed or renewable materials can create stunning, planet-friendly gifts? These projects minimize waste while maximizing charm, offering a thoughtful way to merge craftsmanship with environmental consciousness.
Reclaimed Wood Wall Art

Old pallets, barn wood, or broken furniture pieces can transform into striking wall art with just a little creativity. Sand the wood lightly to smooth rough edges while preserving its weathered texture—imperfections add character.
Design ideas to spark inspiration:
- Geometric patterns: Arrange cut wood pieces into hexagons, chevrons, or abstract shapes. Stain each piece a different shade for contrast.
- Nature motifs: Trace leaves or branches onto wood, then use a jigsaw to cut silhouettes. Mount them slightly off the backing board for a 3D effect.
- Textured collages: Combine wood scraps with other salvaged materials like metal or ceramic tiles for mixed-media appeal.
Use sturdy picture hangers or a french cleat for secure mounting. No need for a frame—raw edges keep the rustic vibe intact.
Bamboo Utensil Set
Bamboo grows fast, regenerates without replanting, and resists bacteria naturally—making it ideal for kitchen tools. A handmade utensil set is practical, durable, and wastes less material than mass-produced plastic alternatives.
Steps to craft your own:
- Select bamboo stalks or pre-cut planks (1/2" thick works well). Avoid pieces with deep cracks or splits.
- Shape the tools: Carve spoons, spatulas, or spreaders using a whittling knife or band saw. Keep handles slightly thicker for a comfortable grip.
- Smooth every surface: Sand with 120-grit to remove splinters, then polish with 220-grit for a silky feel.
- Oil for longevity: Coat with food-grade mineral oil to prevent drying and cracking.
For extra flair, wood-burn a tiny leaf or initials near the handle—just enough to personalize without overcrowding the design. These utensils age beautifully, developing a rich patina over time.
Tips for Perfecting Your Wooden Gifts
Creating wooden gifts is more than just assembling pieces—it’s about choosing the right materials, mastering finishes, and adding personal flair. Whether you’re making a rustic picture frame or a sleek cutting board, these tips will help your project look polished and professional.
Choosing the Right Wood for Your Project
Not all wood is the same. Some types are better for carving, while others shine with stains or resist moisture.
Softwoods (Pine, Cedar, Fir)
- Best for: Beginners, projects like coasters, simple shelves, or decorative items.
- Why? Easy to cut and sand, but softer surfaces dent easier. Great for painted projects.
Hardwoods (Maple, Oak, Walnut, Cherry)
- Best for: Furniture, cutting boards, jewelry boxes.
- Why? Denser and more durable, with beautiful natural grain. Ideal for staining or leaving bare.
Exotic or Reclaimed Wood (Teak, Mahogany, Barn Wood)
- Best for: Statement pieces like clocks, wall art, or serving trays.
- Why? Unique colors and textures add instant character, often with built-in rustic charm.
Pro tip: For cutting boards or kitchen items, avoid treated woods or varieties with strong odors (like cedar). Stick to food-safe choices like maple or walnut.


Finishing Techniques for a Professional Look
A good finish protects your project and makes the wood’s beauty pop.
Staining
- Enhances grain and adds rich color. Always sand first (120-220 grit) for an even coat.
- Oil-based stains penetrate deeper; water-based dries faster and cleans up easily.
Sealing
- Polyurethane: Tough and waterproof. Use for high-use items like tables or trays.
- Mineral oil: Best for cutting boards—reapply monthly to prevent drying.
- Beeswax: Gives a soft, natural sheen to decorative pieces.
Sanding Secrets
- Start coarse (80-100 grit) to remove flaws, then work up to fine (220+ grit) for a buttery-smooth feel.
- Wipe the wood with a damp cloth after sanding to raise the grain, then sand lightly again for a flawless finish.
Adding Personal Touches: Engraving and Painting
A custom design turns a nice gift into a cherished keepsake.
Engraving Ideas
- Wood burning: Use a pyrography pen to etch names, dates, or delicate patterns. Practice on scrap wood first.
- Laser engraving: For precise designs (like intricate monograms), local makerspaces often offer affordable services.
Painting Tips
- Acrylic paint: Works on raw or stained wood. Seal with a clear topcoat to prevent chipping.
- Chalk paint: Gives a matte, vintage look. Distress lightly with sandpaper for a weathered effect.
- Stencils: Perfect for crisp lettering or repetitive patterns (think florals, geometric shapes).
For mixed-media gifts, try combining techniques—like a stained wooden box with hand-painted lid details and a brass clasp. The more layers, the more personality.
Conclusion
Handmade wooden gifts carry a warmth and personality that store-bought items can't match. Whether it's a simple coaster or a handcrafted bench, each piece tells a story—one of time, care, and creativity. The projects shared here offer something for every skill level, proving you don’t need expensive tools to make something meaningful.
Grab some wood, pick a project, and start building. The best gifts aren’t just objects—they’re memories in the making. Share your finished creations online or tag them with #WoodenGifts—we’d love to see what you make. For more ideas, check out our guide to beginner woodworking tools. Happy crafting!






See other posts like this one:







Your home for DIY projects, off-grid solutions,
and real-world craftsmanship.
Contact
support@charliesworkshop.net
© 2025 Charlie's Workshop